
Smartblend? Smartblend!
Brief guide
Published with permission of Michel Norel the author of Smartblend plugin |
This program made revolution in technique of taking panoramic picture. Things seemed impossible turned out to be easy.
Taking pictures and blending of profesional quality panoramas becomes easy without of expensive panoramic heads. Even a tripod is not obligate.
Hiding seams

Processed with Enblend

Processed with Smartblend.
This example shows that Smartblend
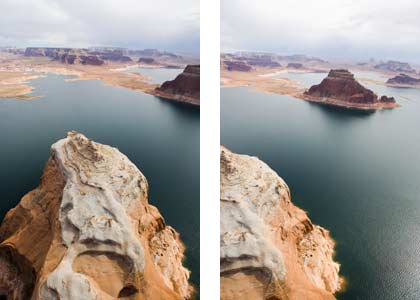
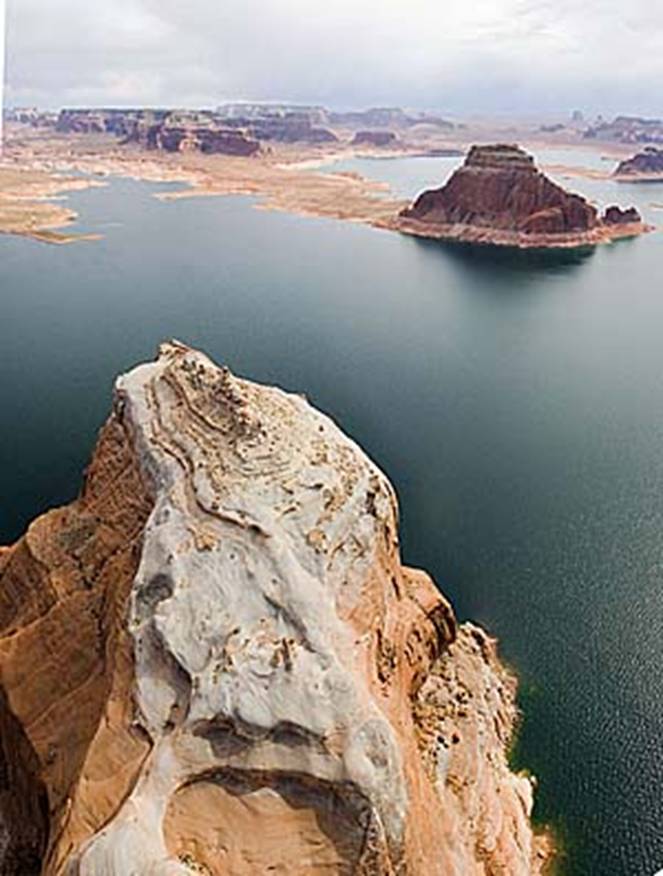
Below is the blended panorama.
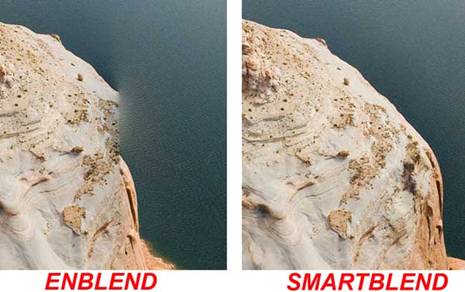
Here are front stage crops made with Enblend and Smartblend.
Pictures with moving objects taken on the streets.

That is simple. Download and unzip the plugin. It is better to place the unzipped folder on the same hard drive (physical or logical) where you are planning to assemble and keep you panoramas. The best is to have a separate hard drive with a free space over 10 Gb and a swap-file placed there. Here is the way to assign a swap-file in Windows XP.
Right-click on My computer icon. Choose Properties and click on the Advanced tub. In the field Performance choose Settings-> Advanced. Click the button Change In the field Virtual memory. Select the drive you want and point at System mamaged size.
Then the button Set must be pushed !!!!!!
The screenshot below shows a paging file assigned to Drive D.
After you pres OK the system will prompt you to reboot. Having rebooted launch PTGui and configure it to work with Smartblend. Choose Options in menu Tools.
In the opened window choose Plugins tub and in the field Smartblend indicate the path to the plugin using button Browse. Then press ОК.
Now it's ready. When the source images are warped Smartblend window will be opened and in the most cases you'll get a panorama that wouldn't need serious retouching.
As an additional example you can download the archived project with pictures taken by Oleg Gaponiuk (Olevka) we have already reviewed in this topic.